It all started in October 2018. We had been kicking around the idea of growing CBD Hemp for a while. It was time to make a decision. After some further noodling, we decided that we would become CBD Hemp growers and invest the amount of money we would be comfortable with losing if the crop failed. We went ahead and filled out all of the appropriate paperwork and sent the related fees to the State of Wisconsin.
After some time, we received our growers permit for 2019. The growers permit is only good for one growing season. It must be renewed each year and the permit fee paid.
Now we had to make a plan regarding where to purchase plants, determine what soil prep was needed and determine when to plant the transplants. We ended up buying 96 plants from a local farmer and planting in mid-June of 2019.

12×12 planting hole for hemp seedlings.

Hemp seedlings planted in prepared beds are shielded by milk cartons to protect them from critters.

Hemp seedlings planted within garlic bed.

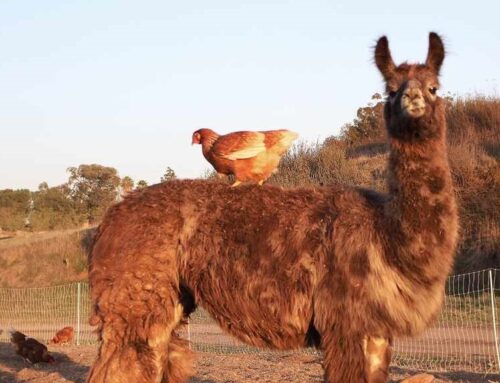
Established hemp plants required 2 gallons of water weekly.

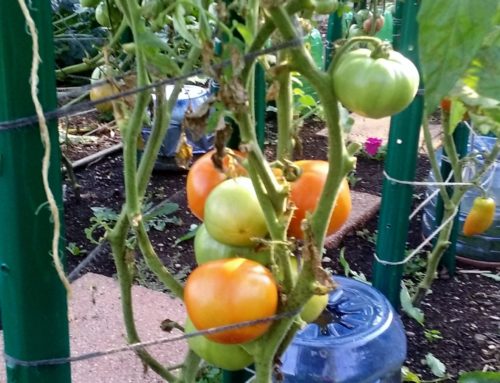
Hemp plant in spinach bed.

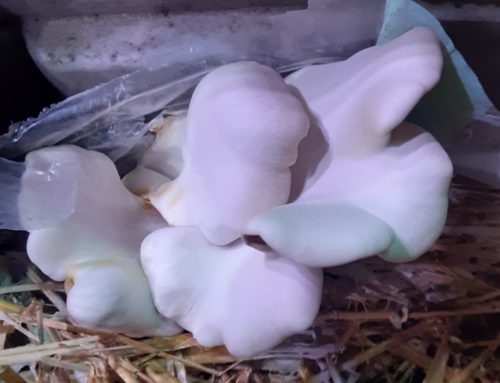
Trimmed hemp leaves add great nutrition to baked goods, like zucchini bread.

Mature hemp plant provides shade to keep the spinach cool.

Pulling the fan leaves opens up the hemp buds to air and light.

Who remembers “Cousin It”?
May
About 6 weeks prior to planting, we started our soil prep. This soil prep process involved:
- Pre-digging each hole (12” X 12” X 12” or a cubic foot in size) and placing the excavated soil into a wheel barrel. This soil was amended with by thoroughly mixing in an organic sustained-release fertilizer, which we formulated. This amended soil was then returned to the hole. Each hole was marked with a wood stake.
- We also decided that we did not wanted to spend much time weeding. Thus, we purchased a roll of 4-foot-wide 60lb indented kraft paper, to be used as a weed barrier. After we had amended and marked the 96 holes, we laid out the paper weed barrier, being sure to re-position the hole marking stakes. We thoroughly watered the paper weed barrier after it had been placed, to knit it to soil surface.
- In a belt & suspenders move, we also applied 2 inches of wood chip/bark mulch on top of the paper weed barrier. Having the mulch in place helps both to hold down the paper and to make the eventual planting pleasing to the eye.
We finished all of the prep work about 2 weeks prior to planting. Due to all of this preparation, planting out 96 plants was a straightforward process. We watered each plant in with our own custom formulated liquid that helps with rooting and establishment. We placed open topped milk cartons over each plant to aid in plant establishment and reduce critter damage. We left the milk cartons in place until each plant grew out of them.
After we took off the milk cartons, we lost 6 plants to the critters. So, we up’d our game and cut the bottoms off some old 5-gallon buckets we had on hand and placed a bottomless bucket over each plant. This approach eliminated the critter damage.
Over the next 2 weeks the plants established and grew some. It was not until the beginning of August that the plant growth took off.
As an experiment, in mid-June we planted 2 of CBD Hemp plants within 2 different garden beds. These beds had actively growing garlic, which had been planted the prior November. We pulled the garlic plants needed to make space for the hemp plants.
We have been working on improving our garden soil for over 12 years now. We classify our garden soil as “high performance”. The garden bed hemp plants established very well in this soil. The hemp plants were hidden in amongst the 3-foot-tall garlic plants for 6 weeks until the garlic was fully harvested.
By the time the garlic was harvested, the hemp plants had grown to a size where they needed more room. We planted spinach in the soil after the garlic had been harvested. Bare unplanted soil is a weed magnet…
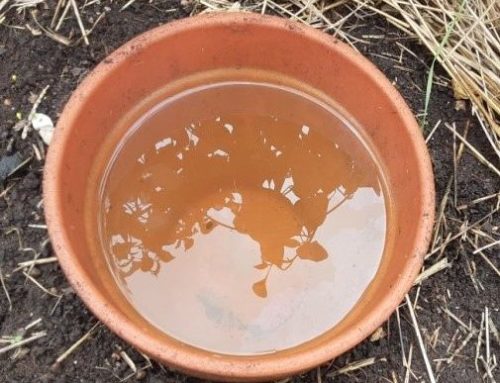
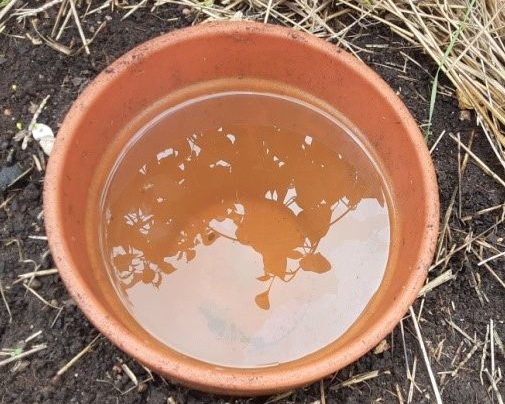
Within our garden beds during our growing season we practice a subsoil irrigation method called Clay Pot Irrigation. For each garden bed hemp plant, we installed 2 eight-inch-wide sealed clay pots on each side, about 10 inches from the plant stem. We filled each pot with water. Additionally, we positioned within the clay pot a filled 4 gallon water jug, in much the same way the water jug is placed in a water cooler dispenser. We actually call this irrigation approach “water cooler irrigation.”
These 2 garden bed hemp plants were the only ones to have clay pot irrigation installed. We did this to determine how much water the hemp plants needed on a weekly basis.
The garden bed hemp plants told us that they needed about 2 gallons of water a week. We adjusted the watering of all of non-garden bed hemp plants to 2 gallons a week. We watered once a week and provided each plant with 2 gallons of water each all at one time. This resulted in deep watering and pulled the roots down into the soil horizon.
Because we had pre-dug each hole and amended the soil with such additives as gypsum and biochar, the soil around each plant was loose and held moisture. The 2 gallons of water added weekly soaked into the soil around the plant easily.
In addition, the combination of paper & wood mulch held the moisture in the soil, so that there was much less drying of the planting bed. The mulch also provided a moisture wick to the soil, as a result of rain events soaking the mulch on repeated occasions.
The hemp plants were slow to grow a few weeks after planting, but by mid-July things changed. It appeared that the plants had established well and had come from Mother Clone plants that were very healthy. At last, they started to size up nicely.
June
We found that there was a wide range in growth characteristics in the 96 plants we purchased. We are guessing that these 96 plants were cloned from a wide range of Mother Plants, which meant that we had different groups of transplants that grew similarly within each group. This manifested itself by having some plants that grew to be about 2 feet tall and other plants that grew to be 5 feet tall, even though they were all the same cultivar.
July
The 2 hemp plants that were in the garden beds grew to be the largest in both height and width. Keep in mind that we have been working on the garden bed soils for 12 years, as well as, these 2 plants had been inter-cropped into a bed of garlic.
August
Once we entered August with the heat of the summer in full swing the hemp plants all leafed out well. At this point we started to treat the hemp plants like tomato plants. Thus, we started to pull the bottom fan leaf from all of the plants in order to drive more energy to flowering, as well as, open up the plants to reduce the potential for mildew.
Not ones to waste a potential resource, once we had the fan leaf biomass, we looked at how it might be used. The first way we utilized this leaf biomass was to use it to cook with. We included the fan leaf in making zucchini bread and dog treats. We also steamed some to see how it tasted (not that great!). We settled on the zucchini bread recipe and the dog treats as the best uses.
Taking the leaf off of the hemp plants was a weekly event during the month of August. For next growing season, we will wash and spin dry the fan leaf, followed by food processing them into smaller uniform pieces. Then we will freeze this processed biomass into 1 cup portions. Each 1 cup portion is enough to enhance the recipe for 2 loaves of zucchini bread.
During the month of August, we had some aphid activity on the hemp plants. We noticed the aphids were concentrated on the plants that were bigger and actively growing. The aphid pressure was lower on the slower growing plants.
We foliar sprayed the leaves of the hemp plants weekly for the dual purpose of foliar feeding & pest repelling. We used 2 different spray formulas. The first spray formula used was a soap-based liquid that contained a range of different essential oils and diatomaceous earth. This first preventive formula works to clean the front and back of the plant leaves. This is especially helpful if insect eggs have been laid on the back of the leaf. The essential oils have a repelling action. The diatomaceous earth contains silica which acts as an irritant for insects. The second preventive formula helps to feed the plant, while at the same time, trigger the defenses of the plant. The ingredients used in this second liquid include a range of bio-stimulants, organically complexed minerals, and essential oils that have an antioxidant effect. Both these liquid spray applications were fine-tuned over the growing season, based on both feedback from Mother Nature and the plants.
September
During the first week of September, the hemp plants started to flower. This process triggered us to call the state of Wisconsin Hemp Program about scheduling a sampler to come out for a visit. During this visit the sampler took flower samples from 25 plants that were uniformly distributed among our 90 hemp plants. The flower to be sampled was the tallest flower spike on each plant. The top 2 inches of this flower was clipped by the sampler and placed into a paper bag. All flower samples were placed into the same bag to create a composite sample. This composite sample was used by the state lab for THC testing.
During the second week of September we sampled flowers from a few different plants to create a composite sample that we sent into a private lab for CBD and THC testing. These results gave us a sense of where our plants were in producing CBD & THC in the maturing flowers and provided data to independently validate the state lab test results. We received back these results a few days after sampling. These results showed that we were in a ‘safe’ zone in regard to the 0.3% THC ceiling limit.
We were visited on September 12th by the sampler. With the sample submitted to the state lab all we could do was continue to tend of plants and wait for the results. This was a stressful time, because if we failed to meet the 0.3% ceiling limit there was a good chance we would need to destroy all of the plants.
It took 2 weeks to get the test results back from the state lab. We were happy to learn that we passed the test! It was then time to shift gears and get ready to harvest and dry the flower biomass.
Leave A Comment